Project Overview
-
Working Time:
5 hours
-
Total Time:
8 hours
-
Skill Level:
Beginner
-
Estimated Cost:
$115
When Sasha Thoen and her husband, Fred, built their farmhouse near Lawrenceburg, IN, she had three compelling reasons to leave the rooms a bit unfinished: The budget was tight, she wanted to get a feel for the house, and the thought of choosing surfaces and fixtures all at once made her head spin. “I’m indecisive—I can’t make up my mind,” Sasha says.
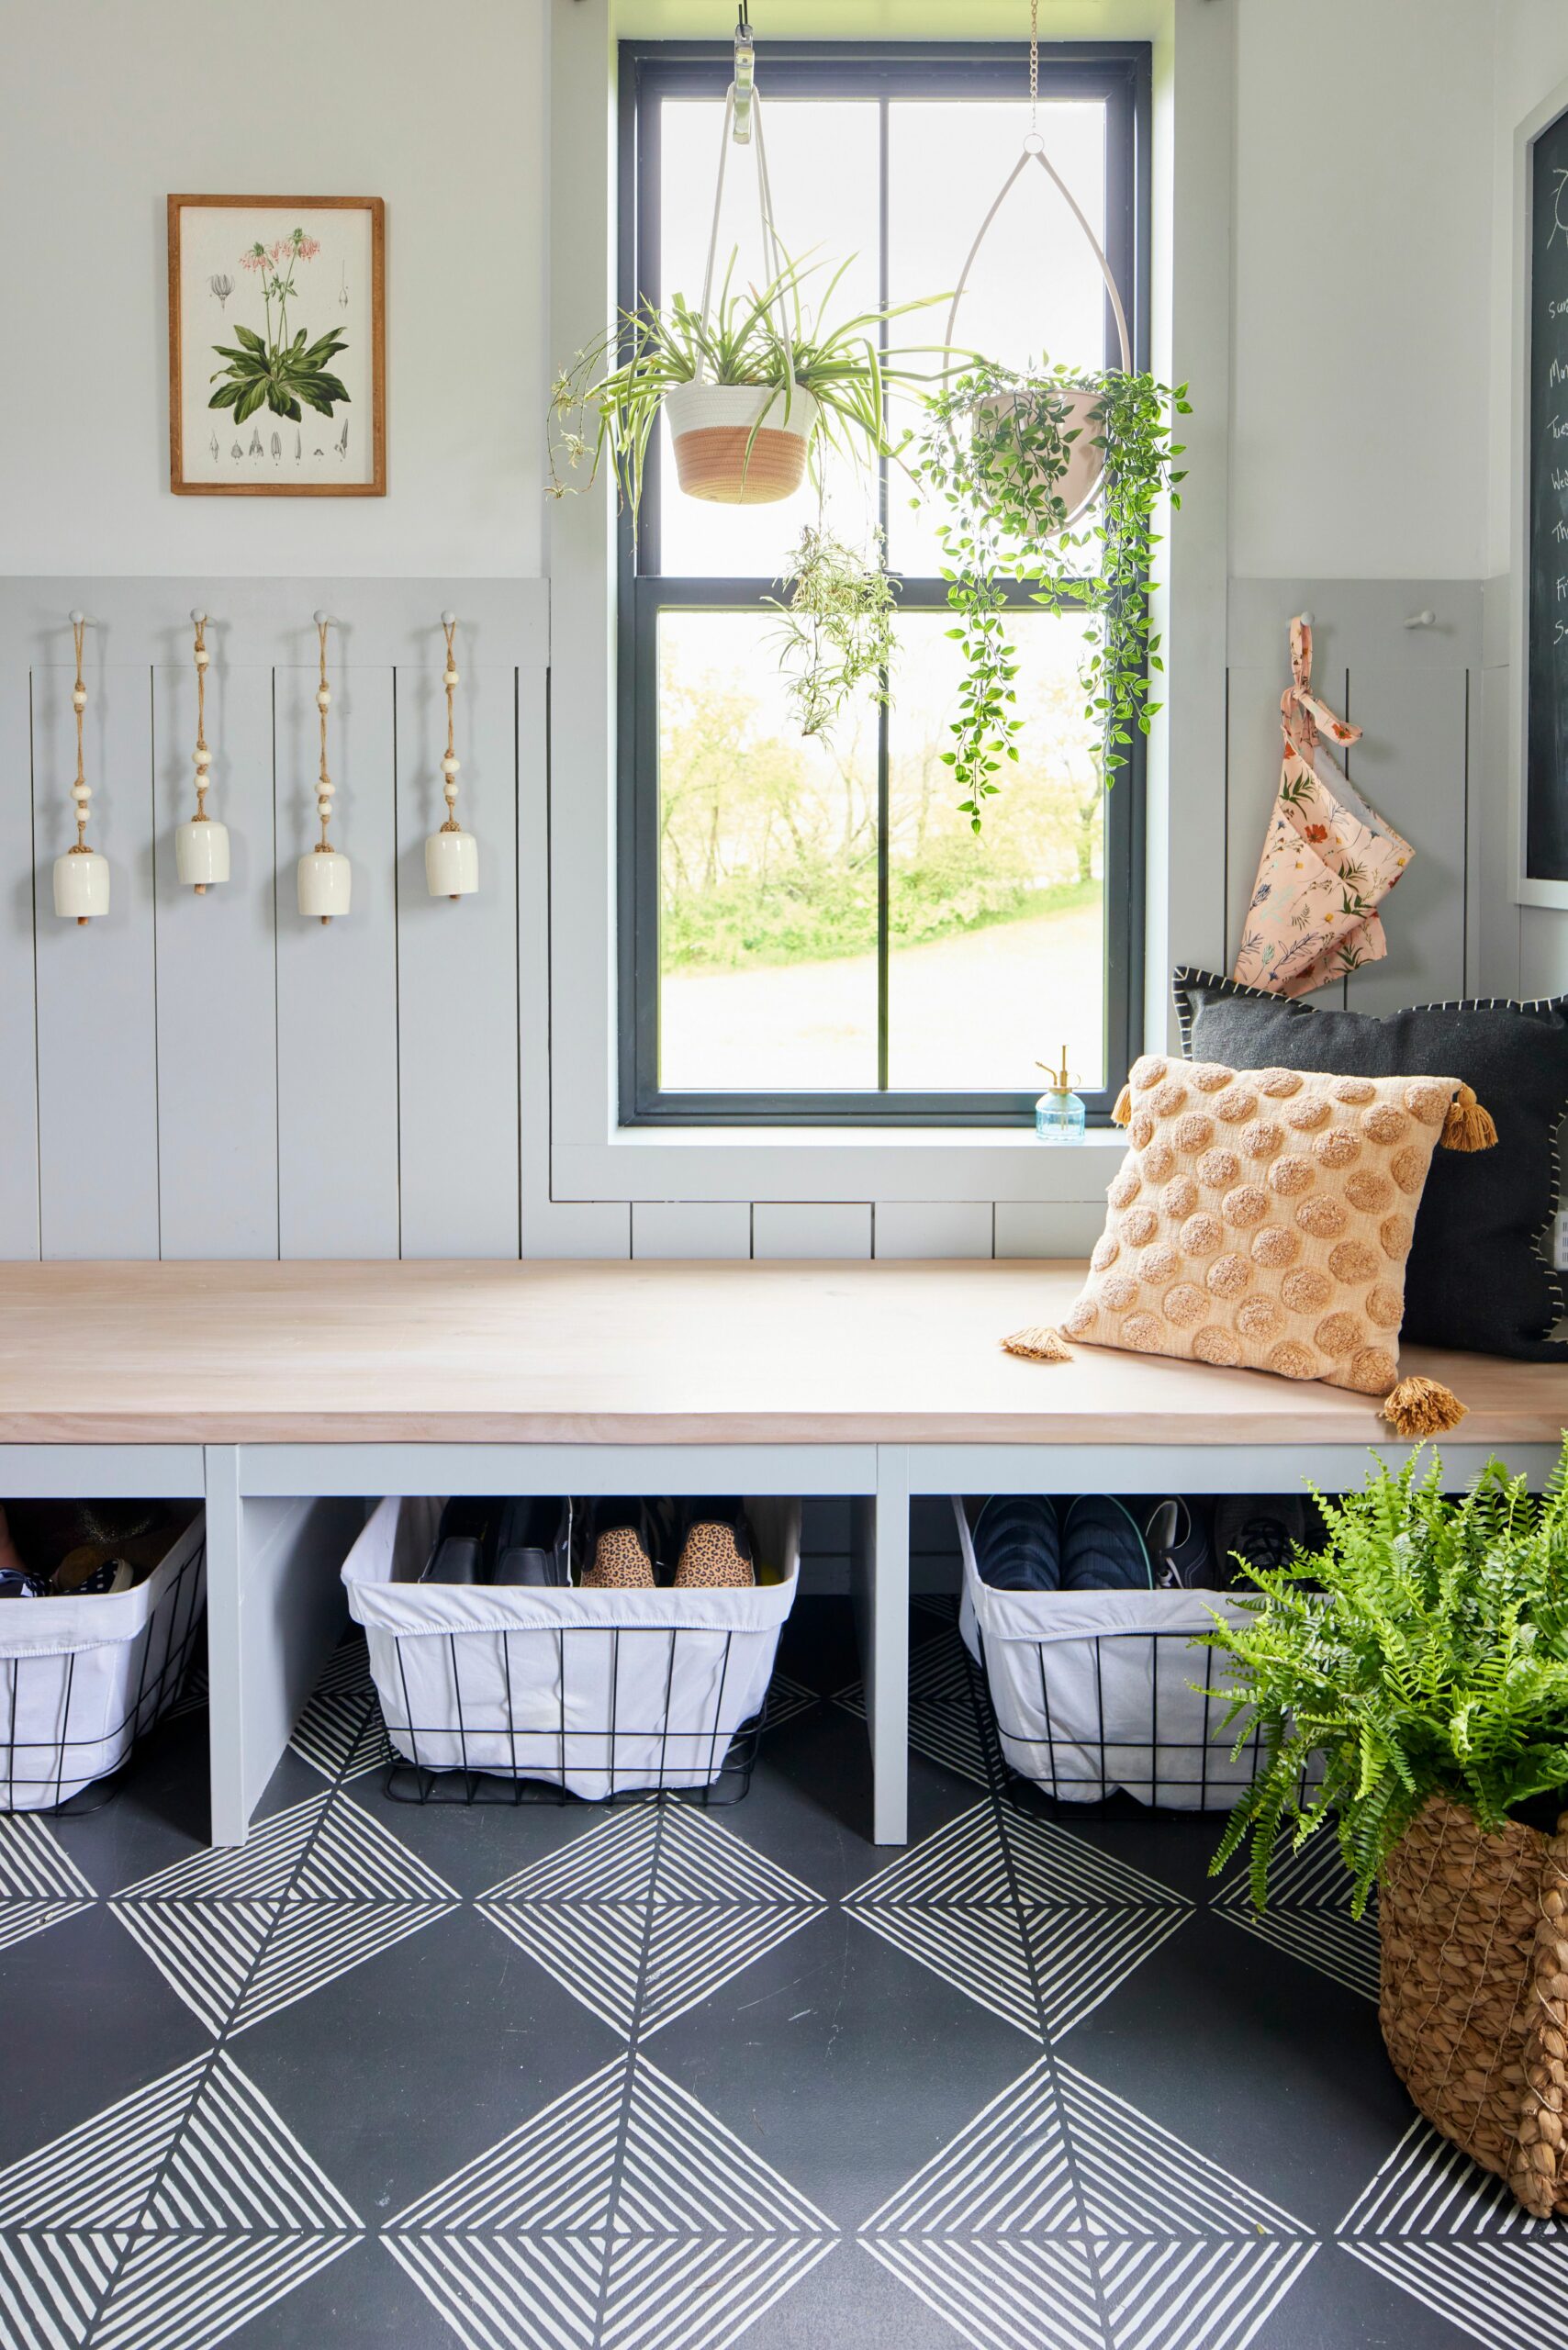
Piles from her family’s habit of dropping belongings on the floor forced decision time in the mudroom, where her biggest challenge was the dark concrete floor. Cement tiles with a geometric design she liked seemed too much of a commitment and too costly, so she mimicked the look with a stencil and paint. “With paint, I can change it in a day if I want,” says Sasha.
The 16-foot-long bench she built along one wall of the mudroom gives the family a place to drop bags and also stash shoes in baskets tucked under it. But the floor wins for visual impact. “There’s a wow factor right when you walk in the door,” she says.
Adam Albright
Instructions
Adam Albright
Sasha started her mudroom makeover by cladding lower walls with shiplap while she thought through what to do with the floor. A $25 stencil and black and white paint were her low-investment solution.
-
Clean and Prime Floors
Clean and scrub the floor, then let it dry. Prime and seal the concrete floor after cleaning.
-
Apply Base Coat of Paint
Using a paint roller, apply two coats of black paint (Sasha used Sherwin-Williams Iron Ore), letting everything dry between coats. Use a paintbrush around the room’s edges.
To create depth like what you’d see in stone tiles, use slightly lighter black paint on the roller, let it dry a bit, then roll it onto the floor.
-
Measure and Test
Measure the room’s length and width. Divide each measurement by two, and use those numbers to mark center spots on the floor along each wall. Snap two chalk lines to those marks to create a straight grid for aligning the stencil and to help determine where you want to start. Sasha started at the interior doorway and worked her way out.
Practice stenciling on cardboard before moving onto the floor.
-
Stencil the Pattern and Seal
Position the stencil along a chalk line and tape the edges (or use repositionable spray adhesive). Using a paint roller and white paint, paint over the stencil. To minimize paint bleed, roll in the angle of the stencil design. Remove the stencil and tape and let the paint dry.
Once dry, repeat the process, aligning the stencil against a completed square. Sasha finished five side-by-side squares before branching off them to other areas to reduce the time spent waiting for the paint to dry. Finish with a coat of protective sealant.
If dried paint builds up on the stencil, scrub it off to ensure the stencil lies flat. A flat stencil will help you paint with clean and precise lines.
-
Touch Up Any Imperfections
To smooth noticeably imperfect lines, she used baby wipes to clean wet paint bleeds and an artists paintbrush for touch-ups when dry.


